In this post we will discuss how to import CSV files into NetSuite. There are many options and this post will attempt to cover all of them.
Line Data vs Record Data
Whenever importing data into NetSuite using a CSV file, You have to understand whether you are importing line data or record data.
Suppose we are importing an item. Each line on the CSV file will represent a different item. Each column represents a different field on the item record. If we are importing a transaction, which usually contains a line item we have two options.
- We can group the line data together with the transaction data and have a separate line for each item with the transaction fields repeated.
- We can import two files, one for the transaction and one for the line items.
Imagine and example sales order. Using the first option, we would have a CSV file that looks like this:
| externalid | Document Number | Customer | Item | Quantity | Price |
|---|---|---|---|---|---|
| so1 | so1 | Customer 1 | Item 1 | 5 | 100 |
| so1 | so1 | Customer 1 | Item 2 | 10 | 150 |
| …Other Sales Orders and Line Items… |
As we can see the transaction fields, such as Document Number and Customer, are repeated for each line item.
Using the second option, we would have two CSV files. One for the transaction and one for the line items. The transaction file would look like this:
| externalid | Document Number | Customer |
|---|---|---|
| so1 | so1 | Customer 1 |
| …Other Sales Orders… |
And the line item file would look like this:
| externalid | Item | Quantity | Price |
|---|---|---|---|
| so1 | Item 1 | 5 | 100 |
| so1 | Item 2 | 10 | 150 |
| …Other Line Items… |
Internal vs External IDs
When importing data into NetSuite, you have the option of using internal IDs or external IDs. If you are adding new records you must select external IDs. This ID can be any string or text that you want. The reason NetSuite needs an ID is so that it can group records together. As discussed in the previous section, you can have multiple lines in a CSV file that represent the same transaction. The ID is used to group these lines together.
Preparing the CSV File
The first step is to prepare the CSV file. You can create the file as an XLSX file and then save it as a CSV file.
Make sure that the headers are fully populated and that the data is in the correct format. Dates should be in the format ‘MM/DD/YYYY’ and numbers should not have any commas or dollar signs. Sometimes there will be headers that appear blank but actually have an empty string.
Go to the first blank column and press Ctrl+Space to select the entire column. Then press Ctrl+Shift+→ to select all columns to the right. Then press ALT H D D in succession to delete all the columns.
Press F12 to open the save as dialog. From here you you make sure to select ‘CSV UTF-8’ as the file type in the “Save as Type” dropdown.
Screen 1: Scan and Upload CSV File
This is the first screen you will see when importing a CSV file:
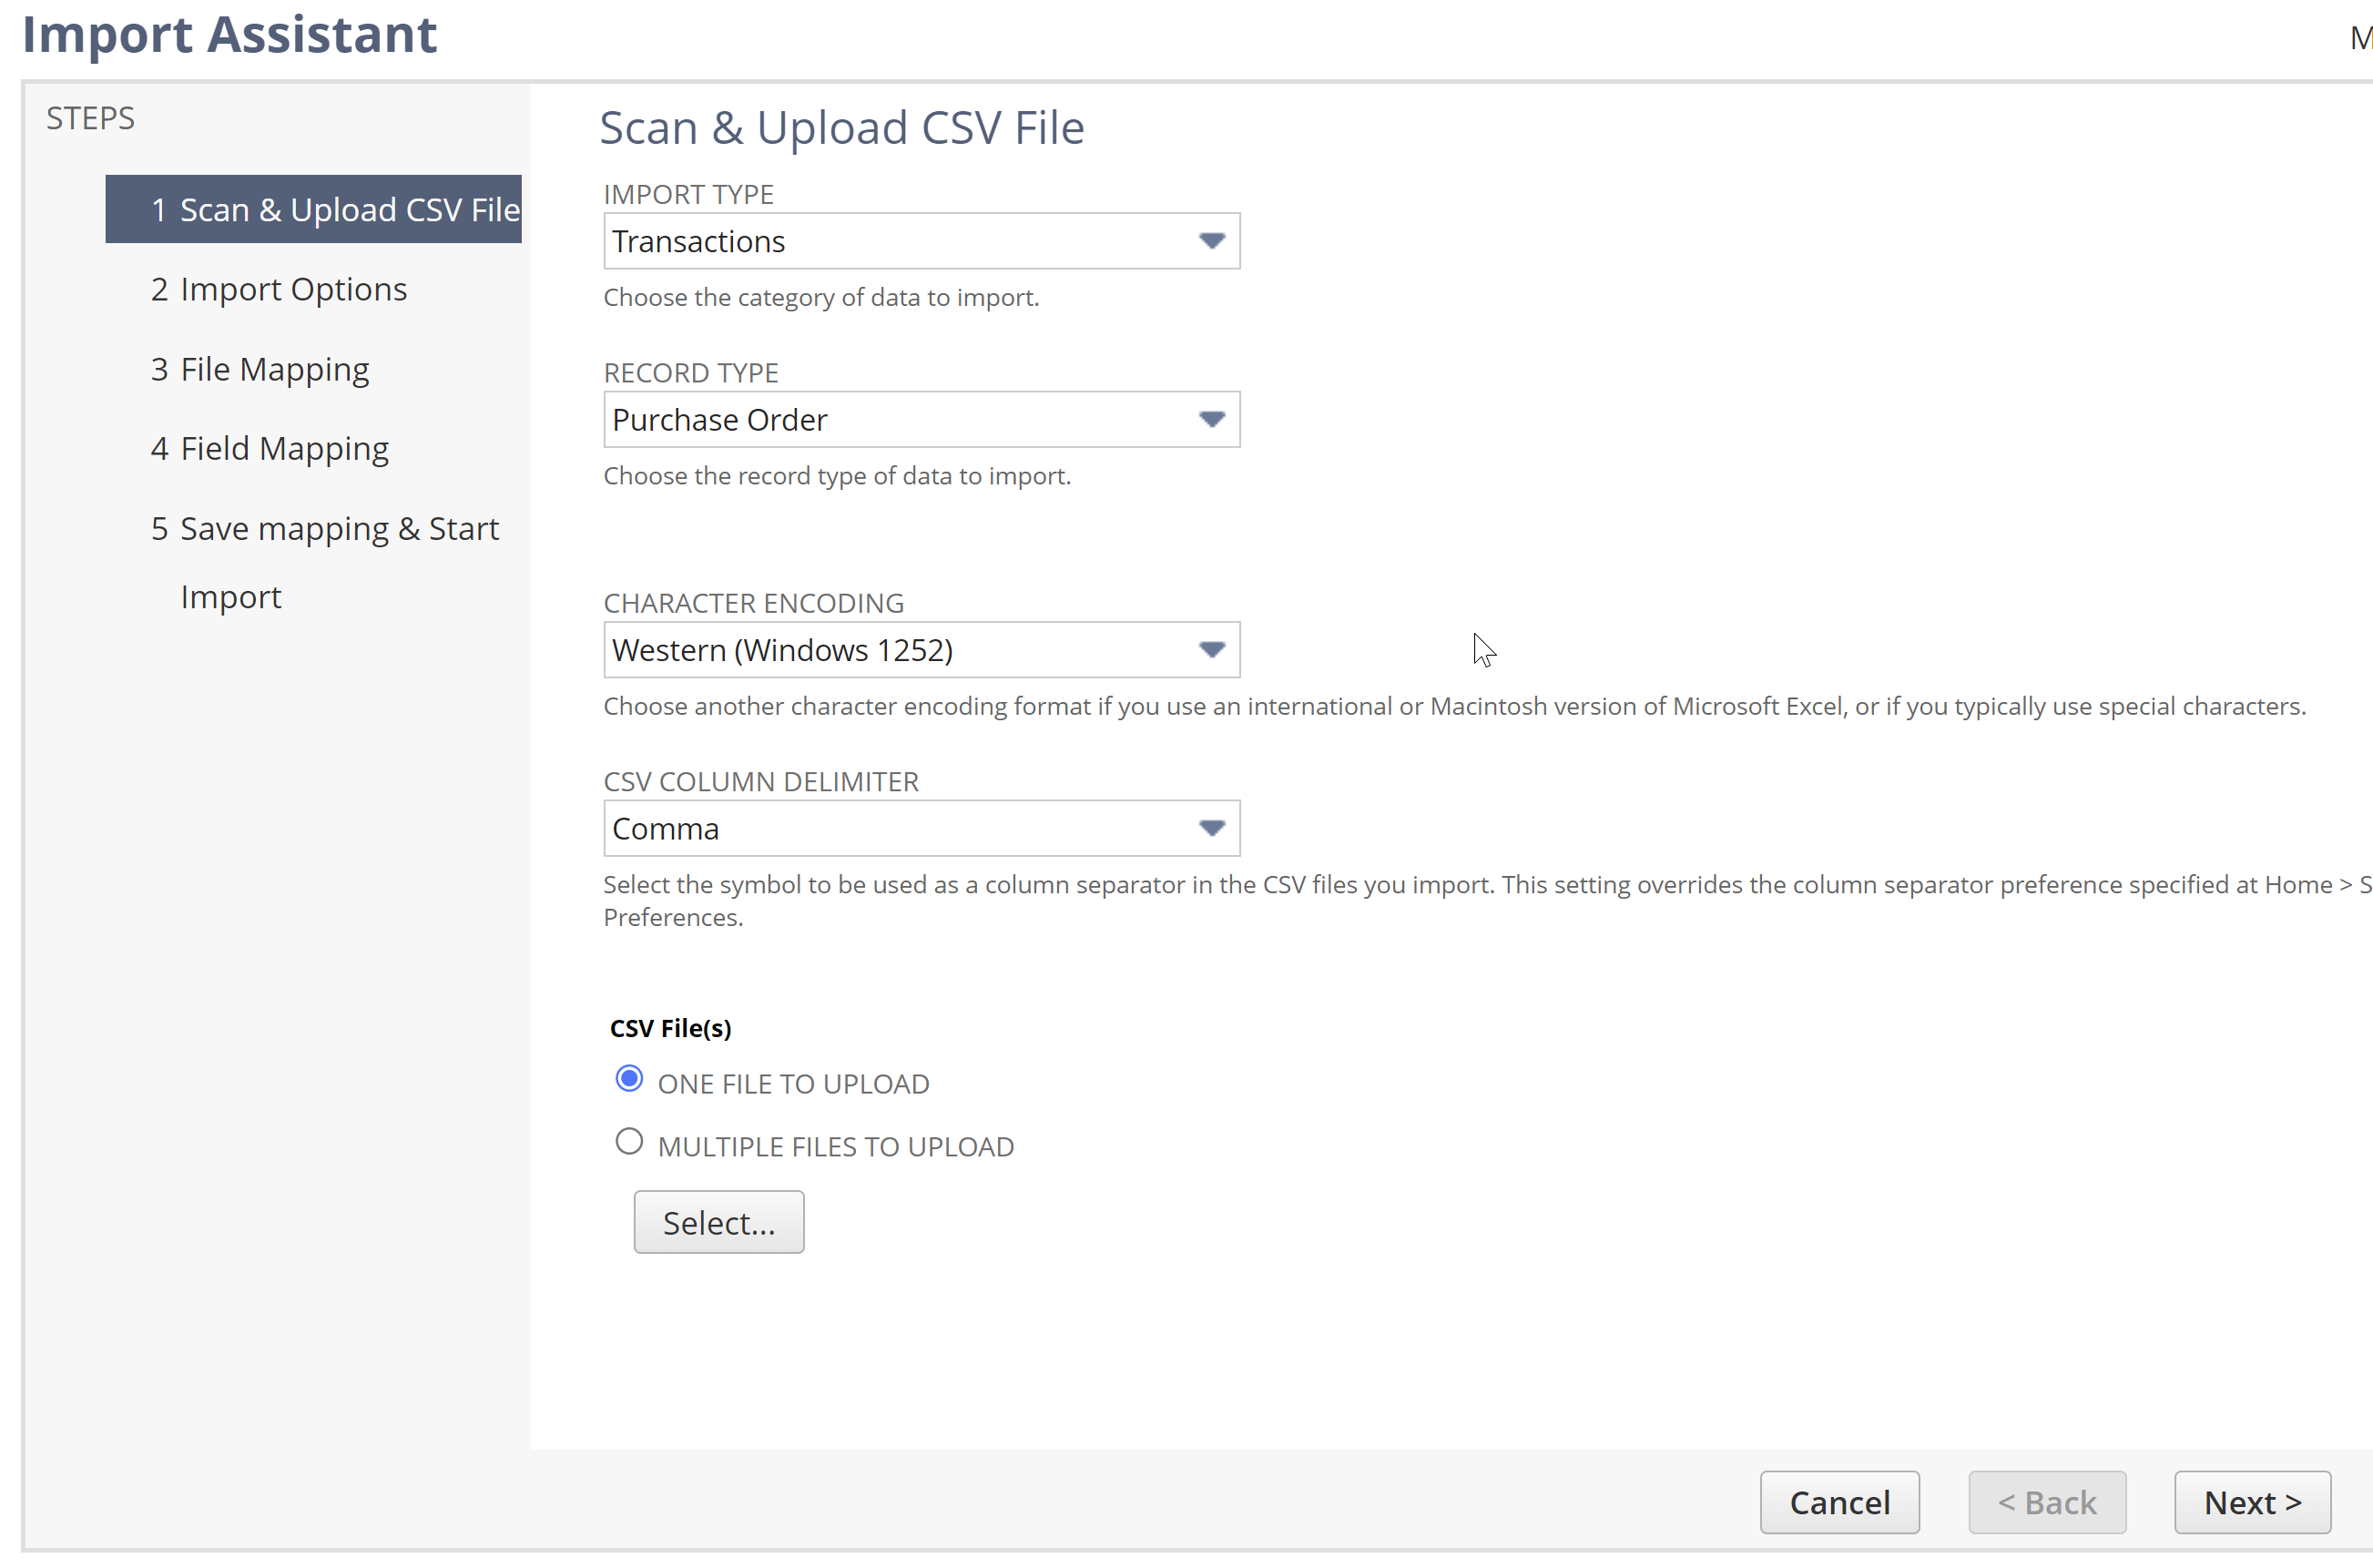
In the drop down “Import Type” select the type of import. In the drop down “Record Type” select the type of record you are importing.
For example if I am importing a purchase order, I would select “Transactions” for the import type and “Purchase Order” for the record type. If I was importing Bins I would select “Supply Chain” for the import type and “Bin” for the record type.
Leave “Character Encoding” as “Western (Windows 1252)” unless you know specifically that you need to use a different one. Likewise, leave “CSV column delimiter” as “Comma” unless you know specifically that you have a different delimiter such as tabs for a TSV file.
In the field group “CSV File(s)” there are two options.
- One File to Upload. This option is if you don’t have line items or if you chose to import the line items in one file.
- Multiple Files to Upload. This option is if you have line items and you chose to import them in separate files.
If you chose “One File to Upload” then you can click the “Select” button and browse to the CSV file you want to import.
If you chose “Multiple files to Upload” more options will appear. Here are the options for a purchase order where “Multiple Files to Upload” is selected:
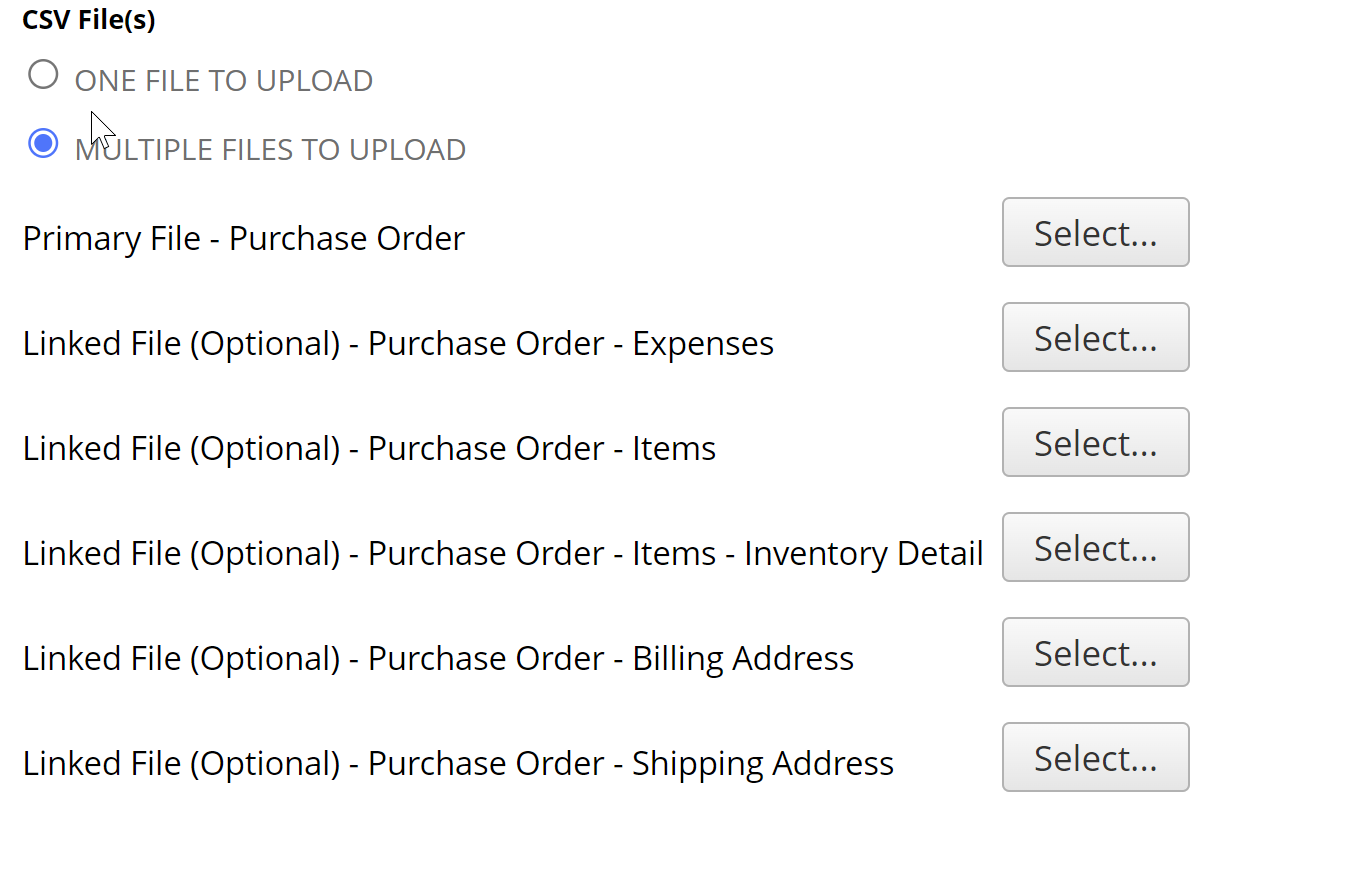
As you can see we can upload expenses, items, inventory detail, and more.
Screen 2: Import Options
This is the second screen you will see when importing a CSV file:
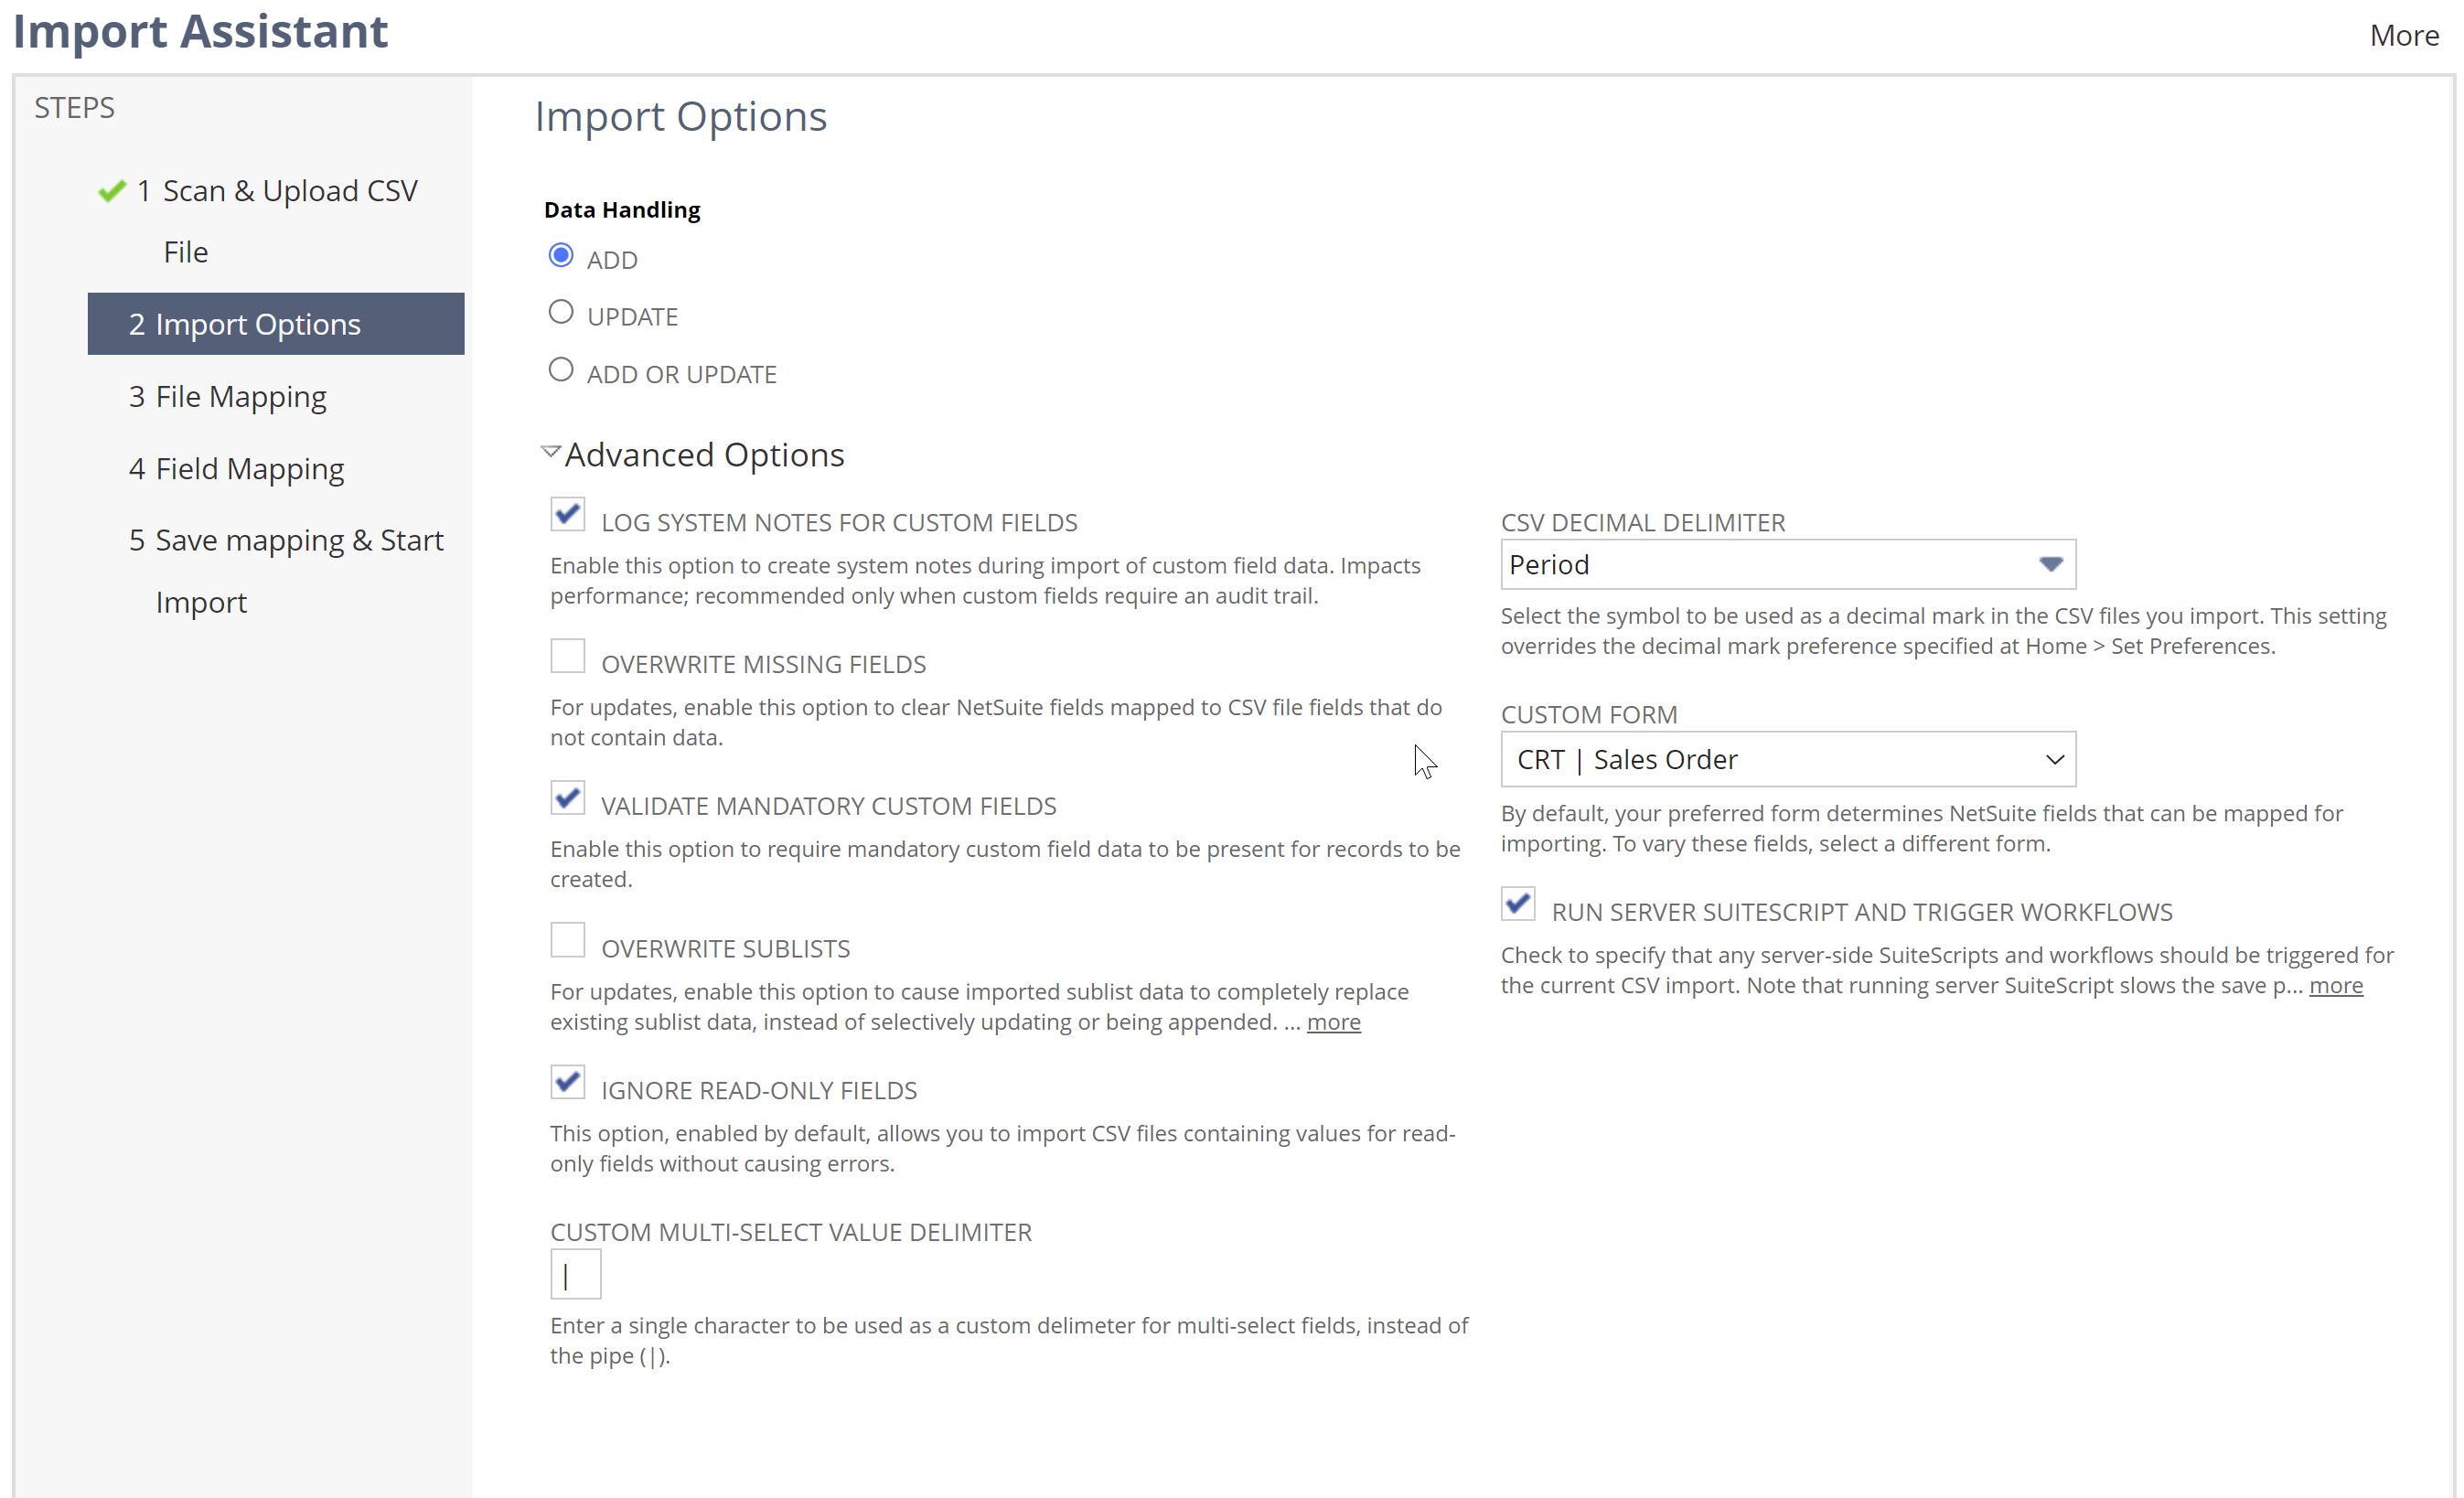
There is a lot going on here.
In the first field group called “Data Handling” we have the following options:
- Add - This will only add new records. If a record already exists with the same external ID, it will give you an error and skip this record.
- Update - This will only update existing records using the ID you provide. If a record does not exist with the same ID, it will give you an error and skip this record.
- Add or Update - This will add new records and update existing records using the ID you provide. If a record does not exist with the same ID, it will create a new record. If a record already exists with the same ID, it will update the existing record.
Most of the fields under Advanced Options have a pretty good description on bottom of them.
The only tricky one is “Overwrite Sublists” and “Overwrite Missing Fields”. if “Overwrite Sublists” is checked, then any sublists that are imported will overwrite the existing sublists. So imagine I’m changing a bill of materials and I want to add a new component. In this case I would leave “Overwrite Sublists” unchecked because I just want to add a component.
If I am completely changing the bill of materials, then I would check “Overwrite Sublists” because I want to completely replace all the existing bill of materials components with the new components.
“Overwrite Missing Fields” applies when I map a NetSuite field to a column in the CSV file and leave it blank. Should NetSuite interpet this as a blank field or should it leave the existing value in place?
Imagine I am updating the purchase price of an item based on some external data. Presumably, if I don’t have a purchase price for an item, I still want to keep the existing purchase price if my calculations don’t yield a value.
But imagine I am updating customer phone numbers. It’s possible that if I don’t have a phone number for a customer, I want to remove the existing phone number. In this case I would check “Overwrite Missing Fields”.
Screen 3: Field Mapping (Only for Multiple Files to Upload)
This screen only appears if you chose “Multiple Files to Upload” in Screen 1
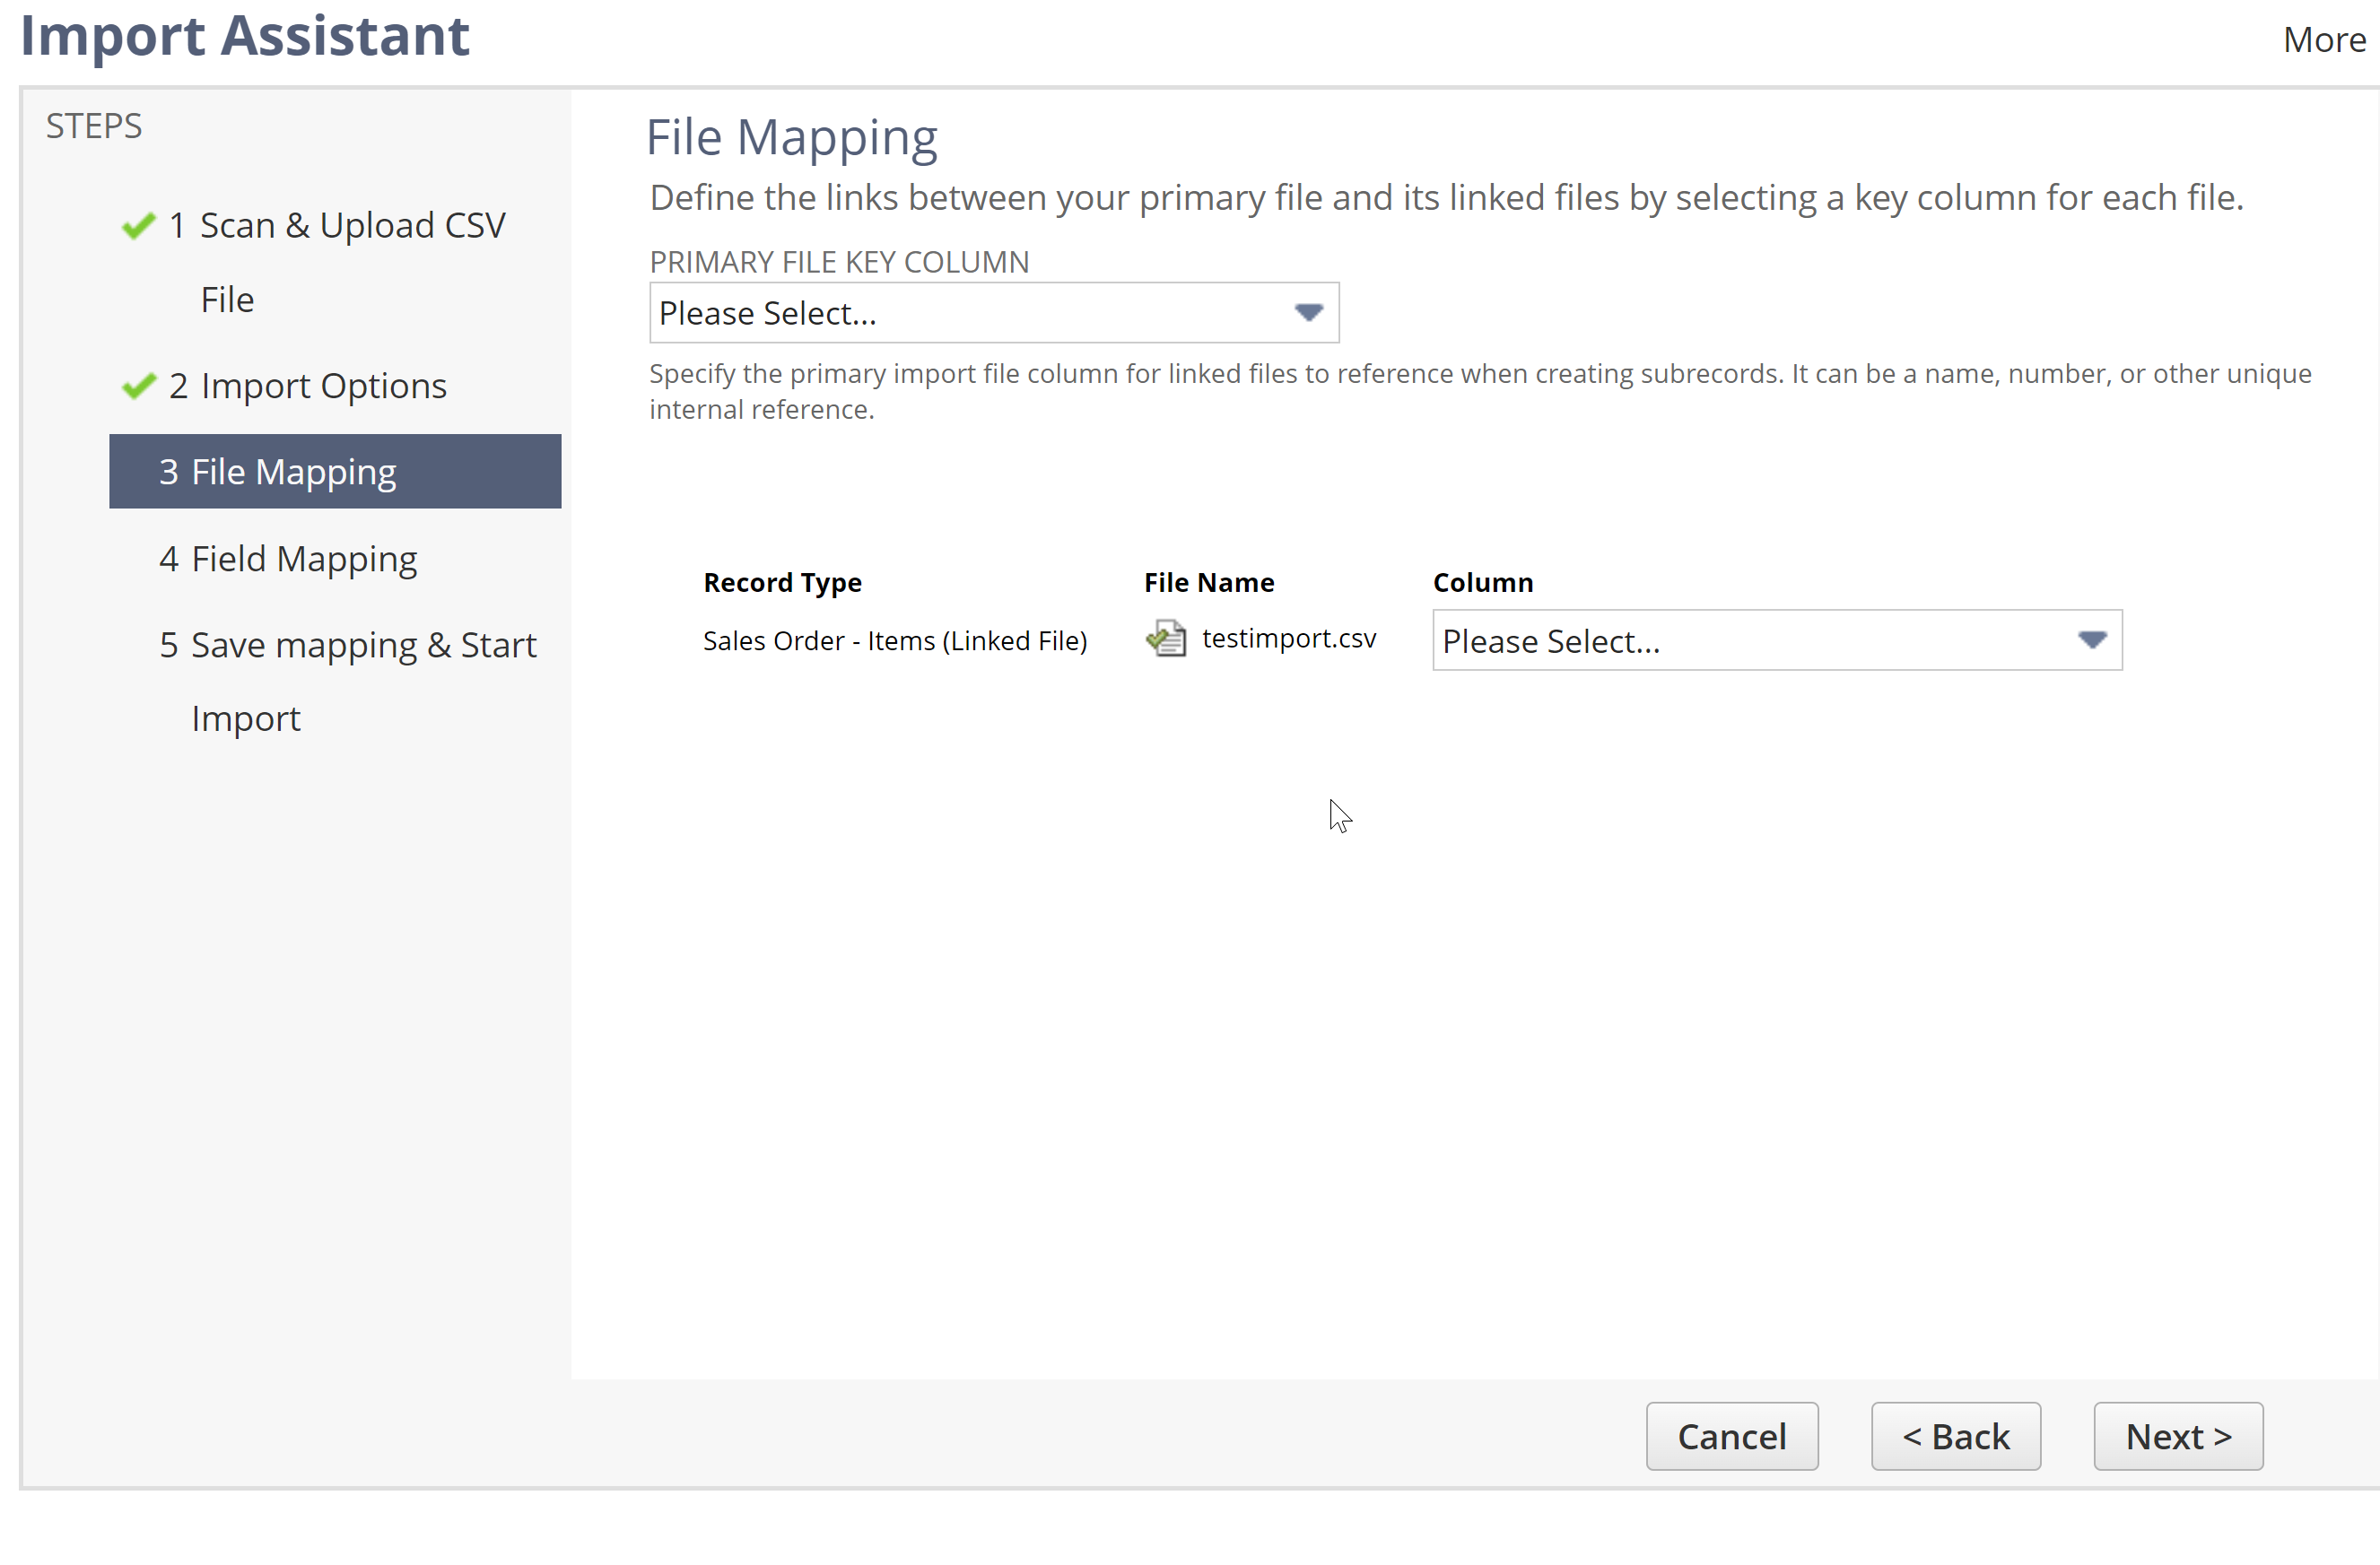
This screen is where you tell NetSuite how to determine which columns in the line CSV files correspond to which lines in the main CSV file.
Using the example sales order from earlier, the field externalid is used to link the line items to the transaction.
I will select the field externalid from both dropdowns and click next.
Screen 4: Field Mapping
This is where NetSuite fields are mapped to the columns in the CSV file.
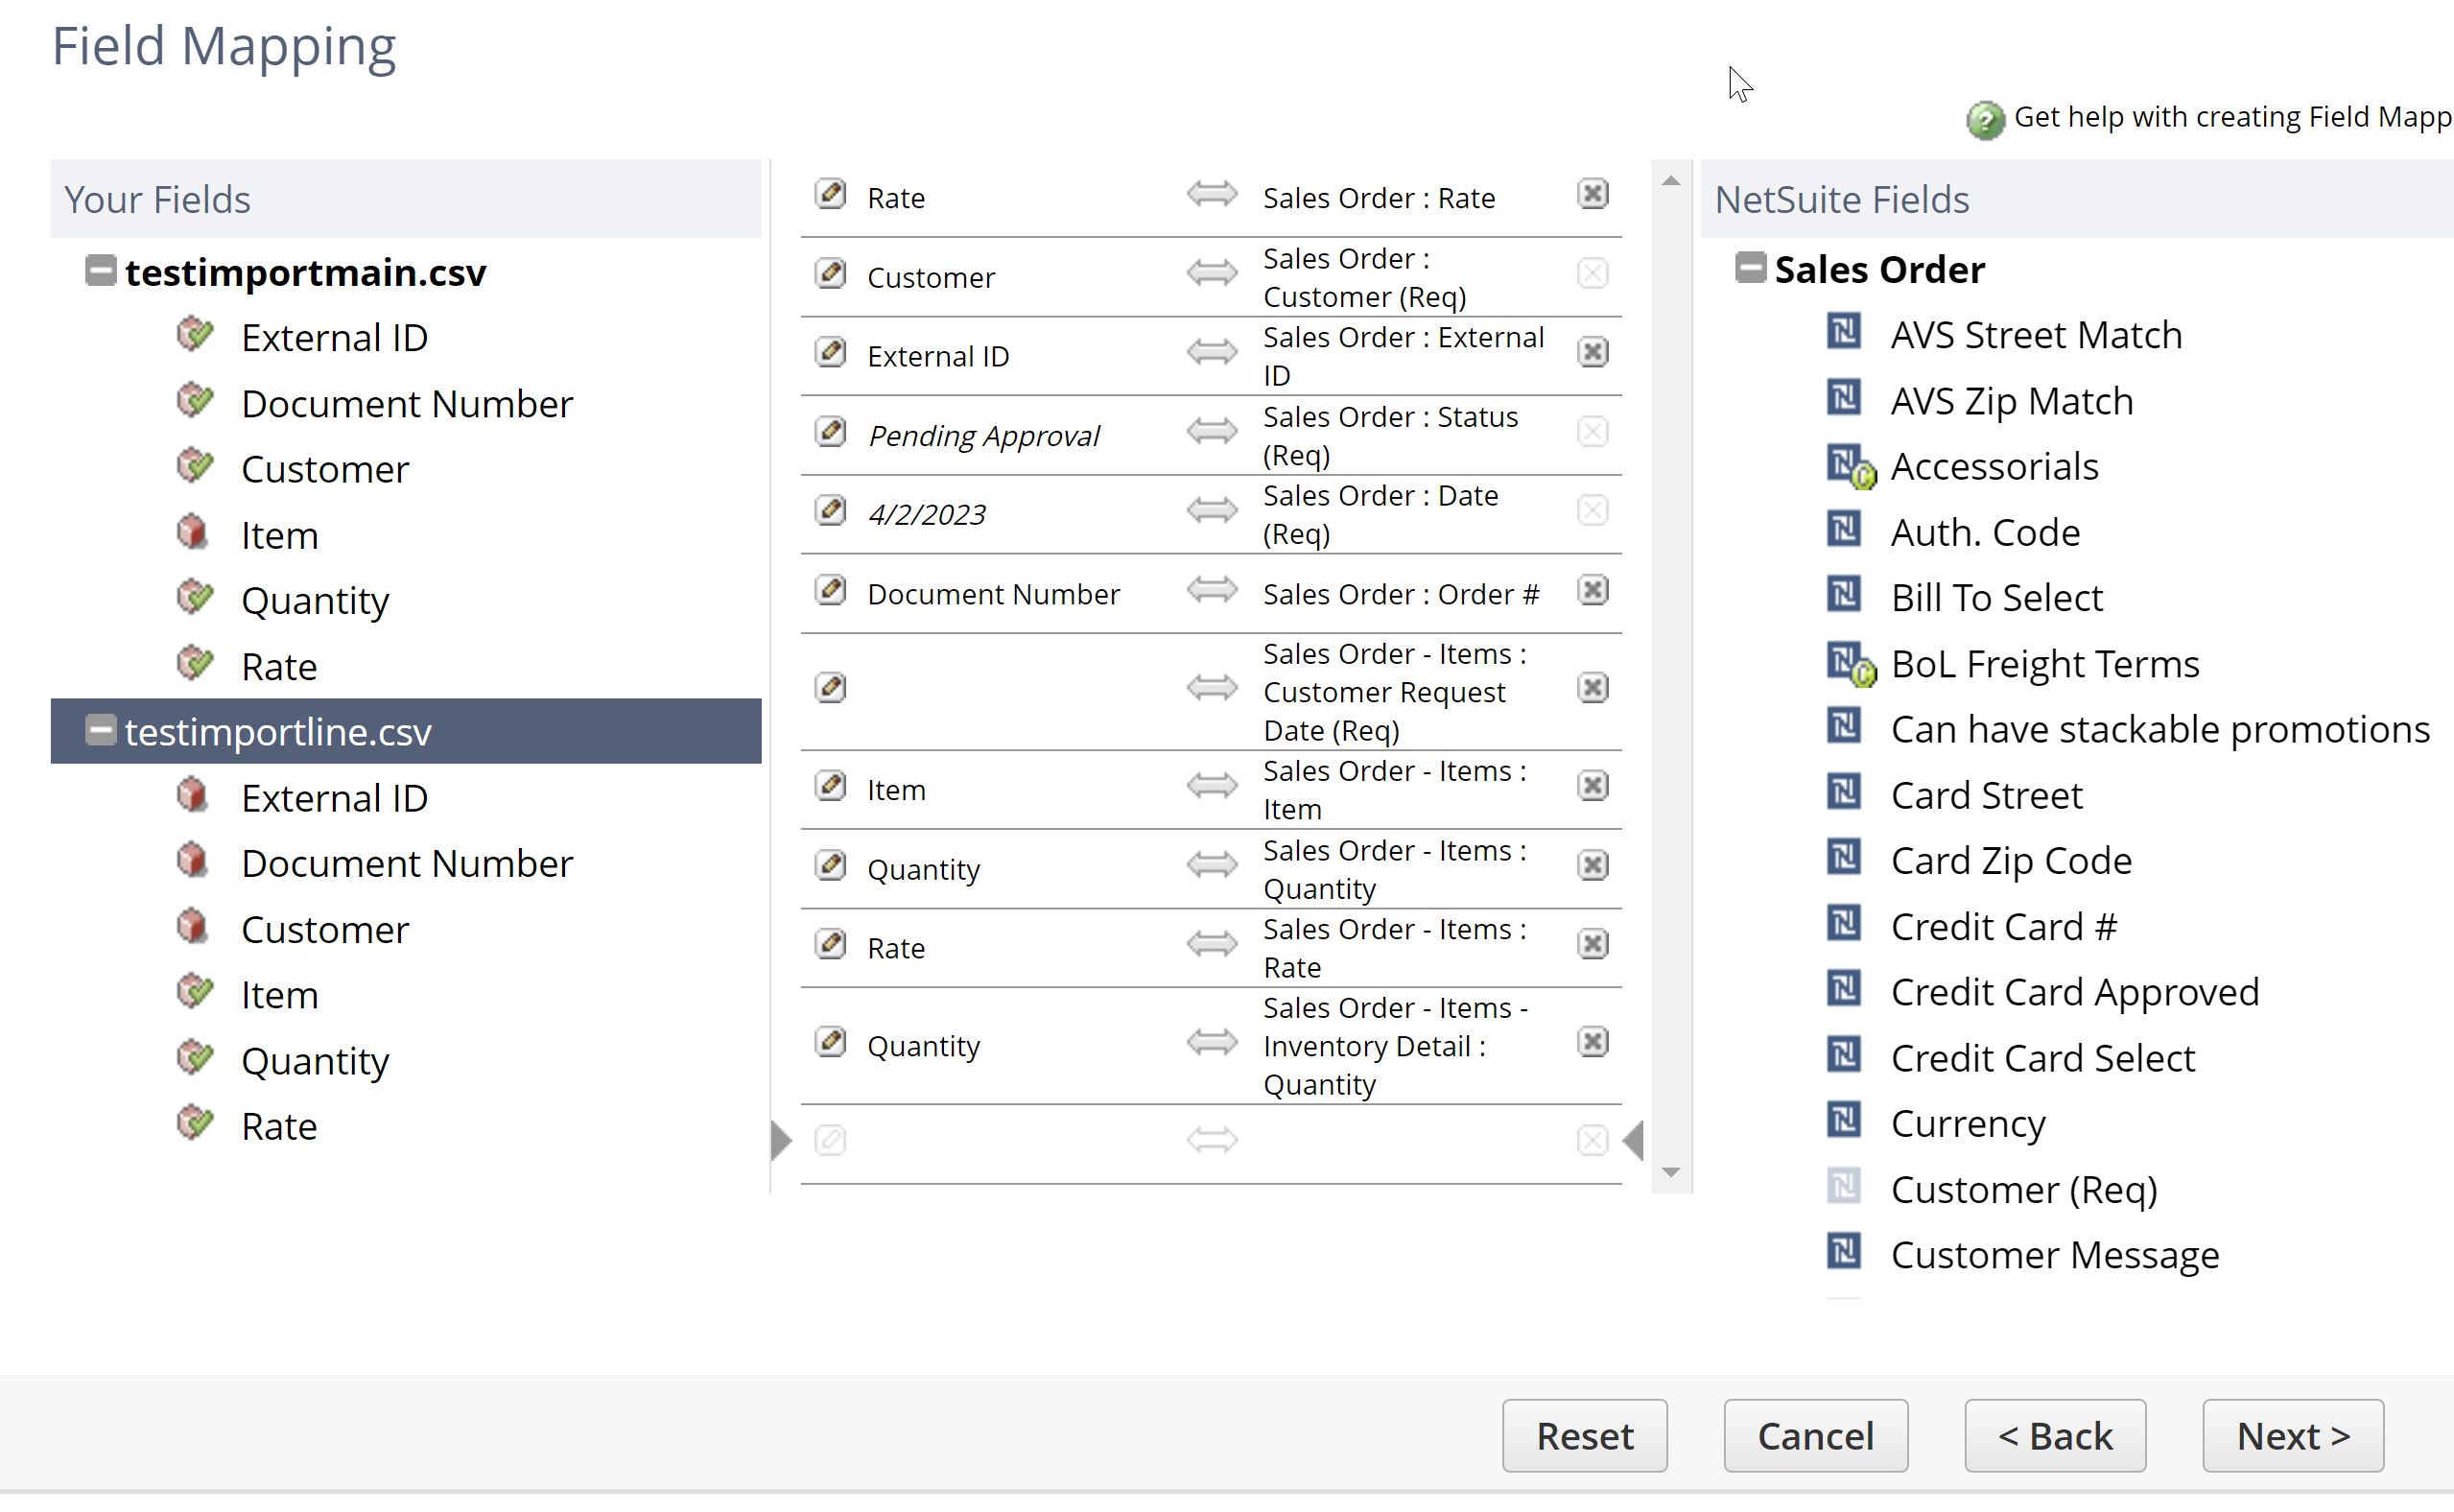
There is a lot going on here.
We have three sections. The section on the left is the columns from our CSV file(s). The section on the right is the fields in NetSuite. The section in the middle is the mapping between the two.
The grey arrows in the middle section denote which line is currently selected.
When you click a field in the CSV file field section it will get added to the mapping section and the next row will be selected. When you click a field in the NetSuite field section it will get also get added to the mapping section. Make sure that the right row is selected in the middle section before selecting a field to map to.
NetSuite will try to automatically map the fields for you.
In the NetSuite section, fields that are required are denoted with the word (Req) in parenthesis. See the Customer field. These fields will be automatically mapped in the middle section. Fields that are custom have a small icon with the letter “c” in a circle. See the field Accesorials.
If we click the minus sign next to words “Sales Order” in the NetSuite section, we can see the different groups of fields that are available. These correspond to the different line item options when uploading a CSV file if you selected “Multiple files to upload”.

The little pencil icon in the mapping section allows you to choose how you are referencing a particular field in NetSuite. Here is an example of the options if you click the pencil icon next to the customer field:
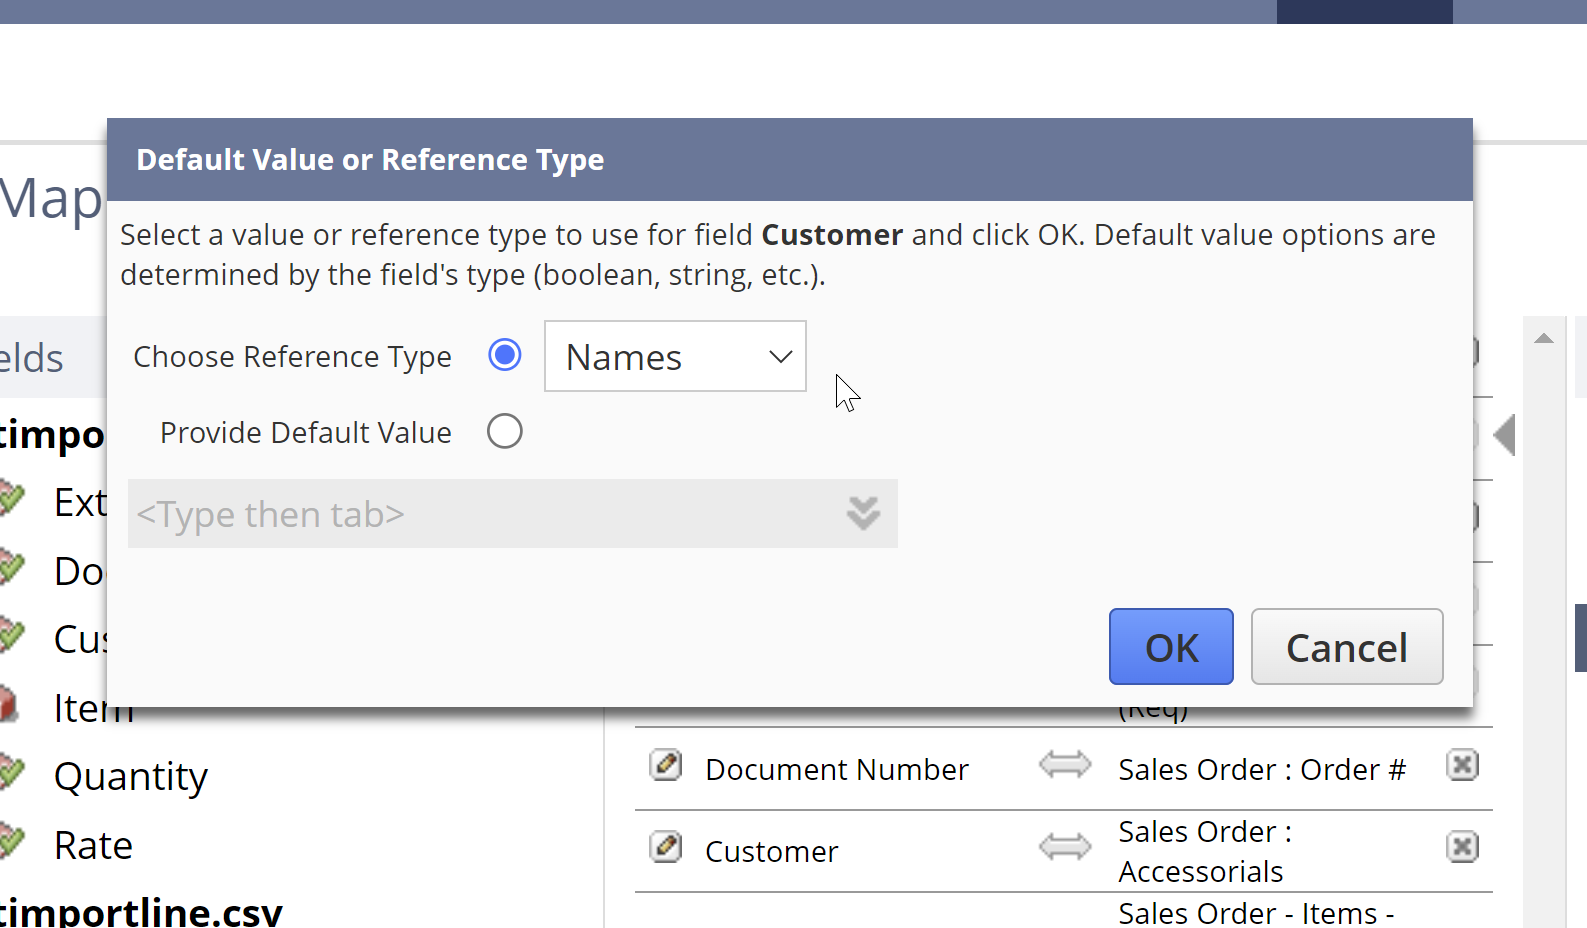
We can either reference the customer or choose a default value that will apply to all lines in the CSV file.
If we choose to reference the customer, we can choose to reference the customer by internal ID, external ID, or name.
Screen 5: Save Mapping and Start Import
This is the last screen you will see when importing a CSV file:
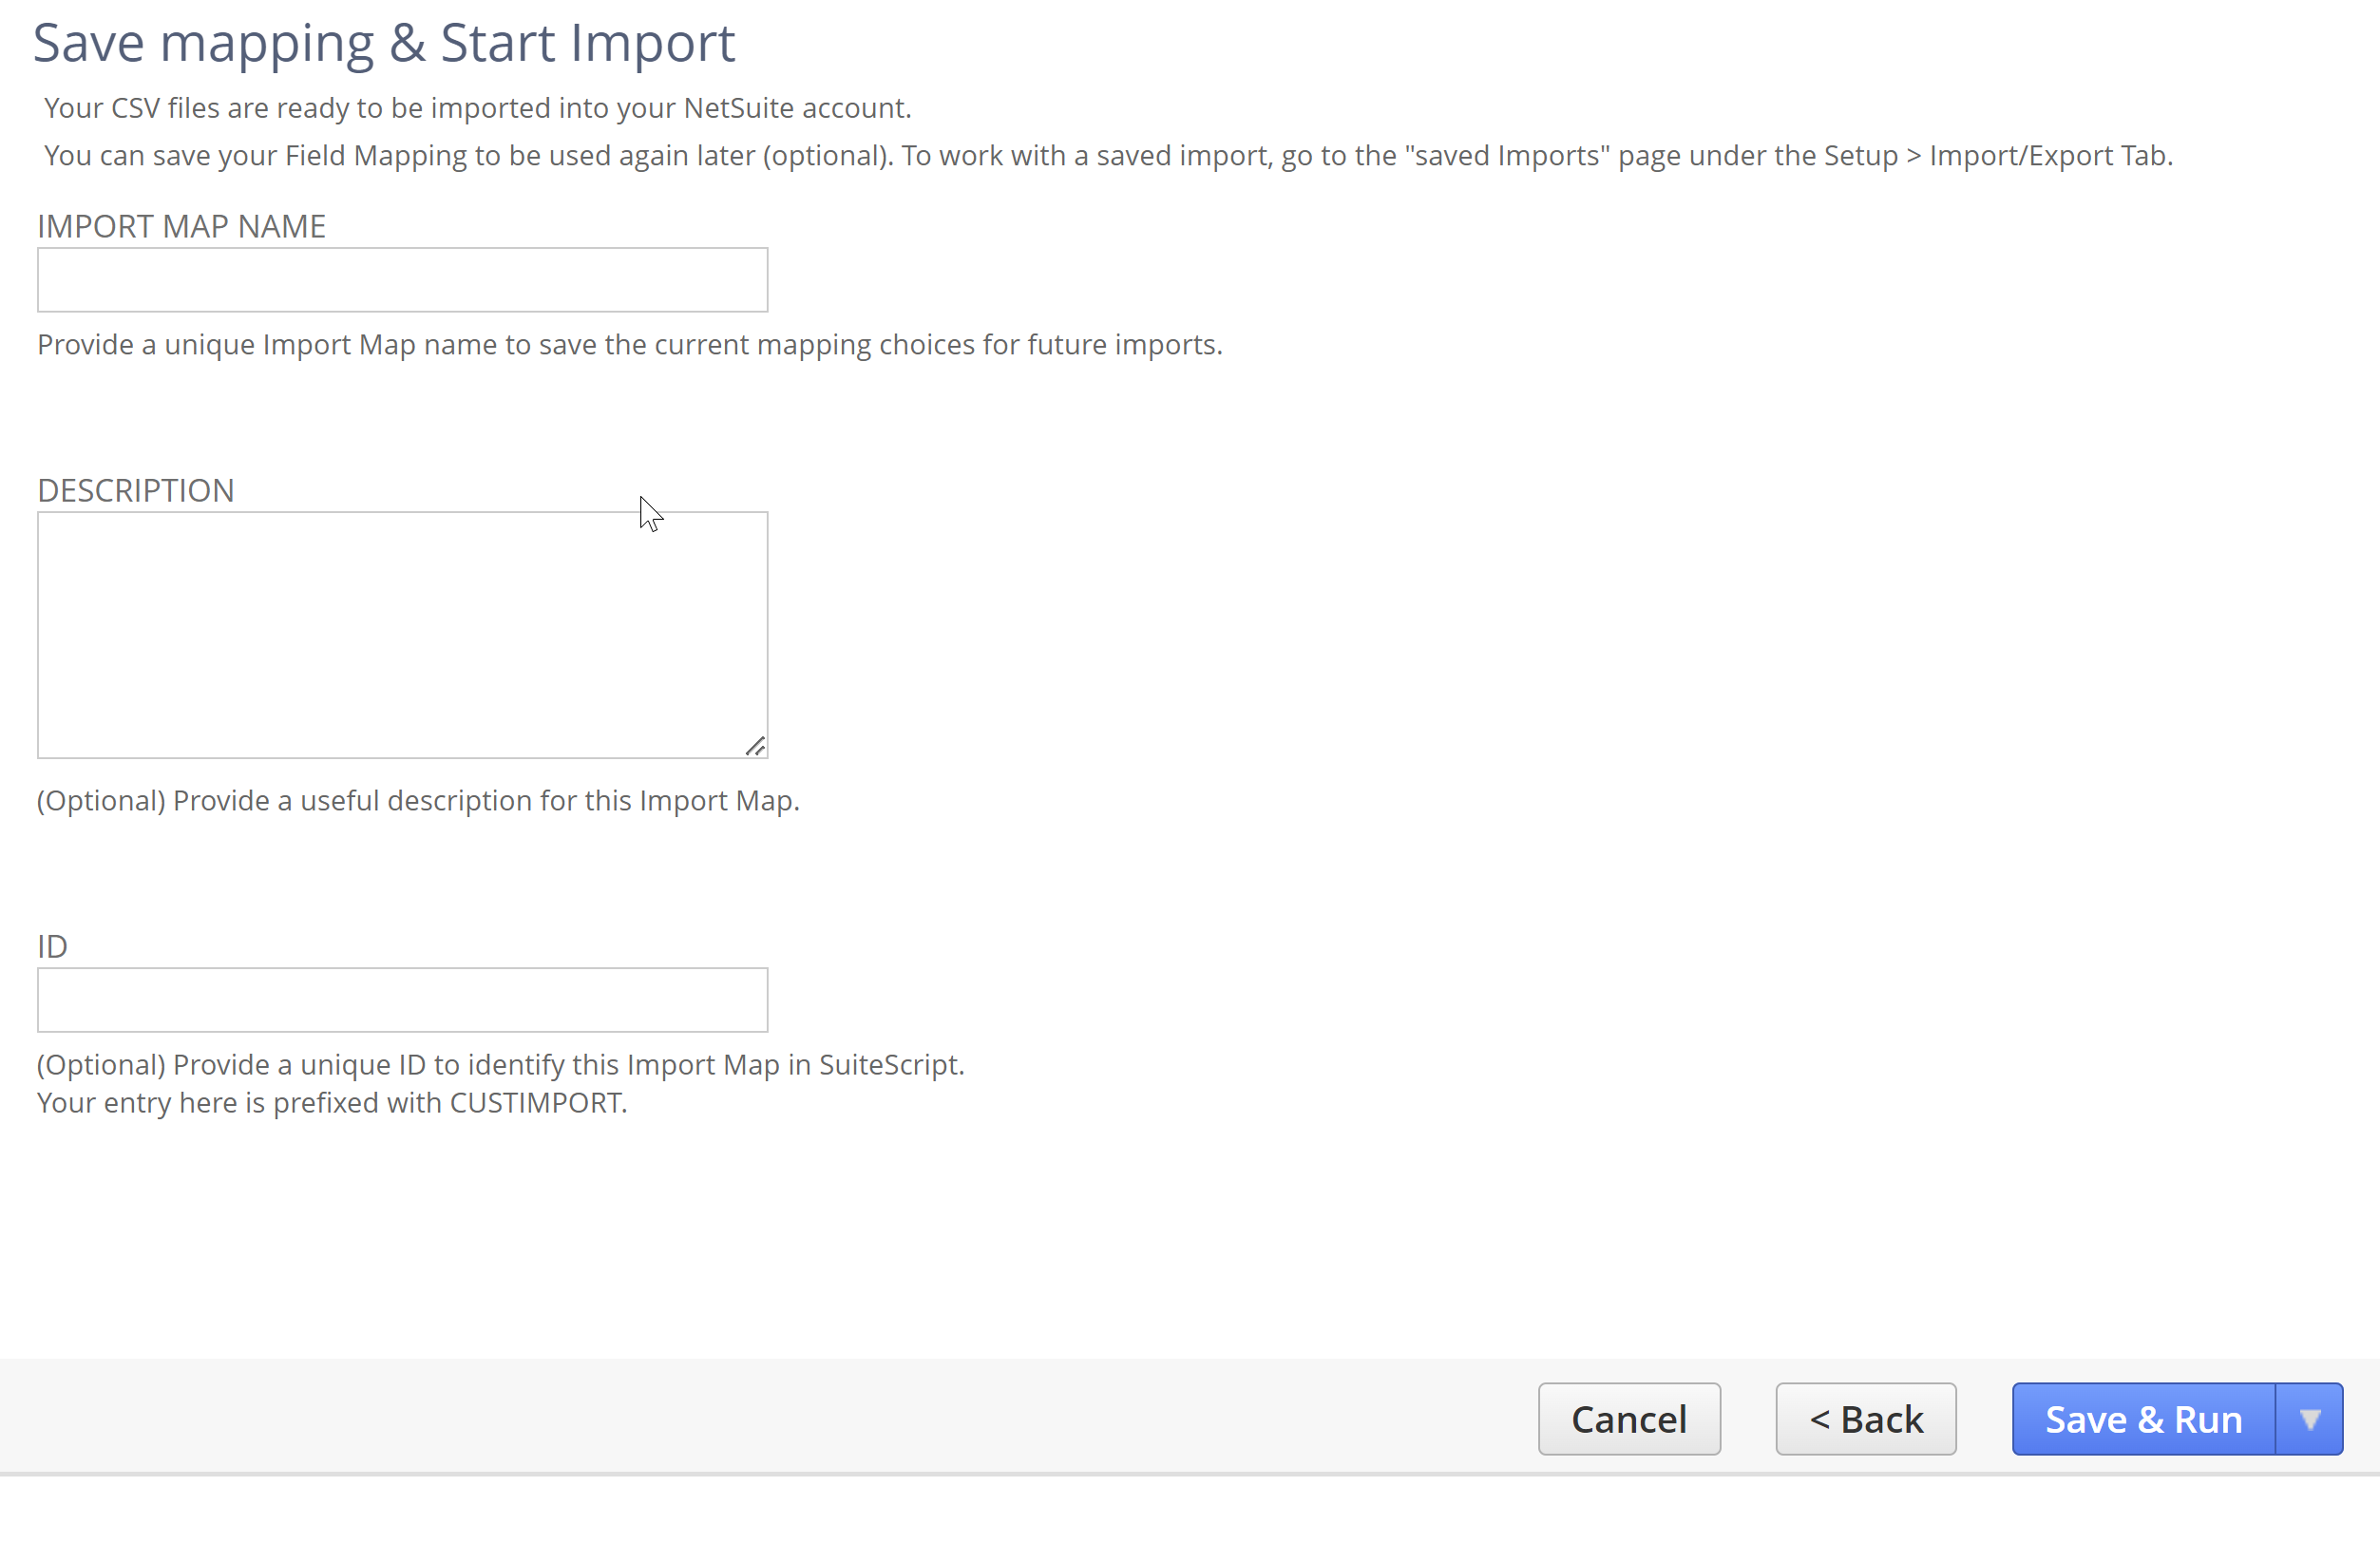
We have three options in the “Save & Run” button in the bottom right corner.
We can save the mapping and run the import immediately. This is the default option. We can save the mapping and run the import later. Or we can run the import without saving the mapping.
It is highly recommended that you save the mapping. If the import fails for any reason, you don’t want to have to re-map all the fields again.
If saving the import, you must give the mapping a name in the “Import Map Name” field. A description can also be provided in the “Description” field.
If you want to run the import using suitescript you can provide a script ID in the “ID” field.
Waiting for the Import to Complete
After running the import you should see a confirmation message:

You can view the status of the import by clicking the “Import Job Status” link. You can also view the status by going to Setup > Import/Export > View Import Job Status.
When the import is complete you will see a message in the “Message” column:
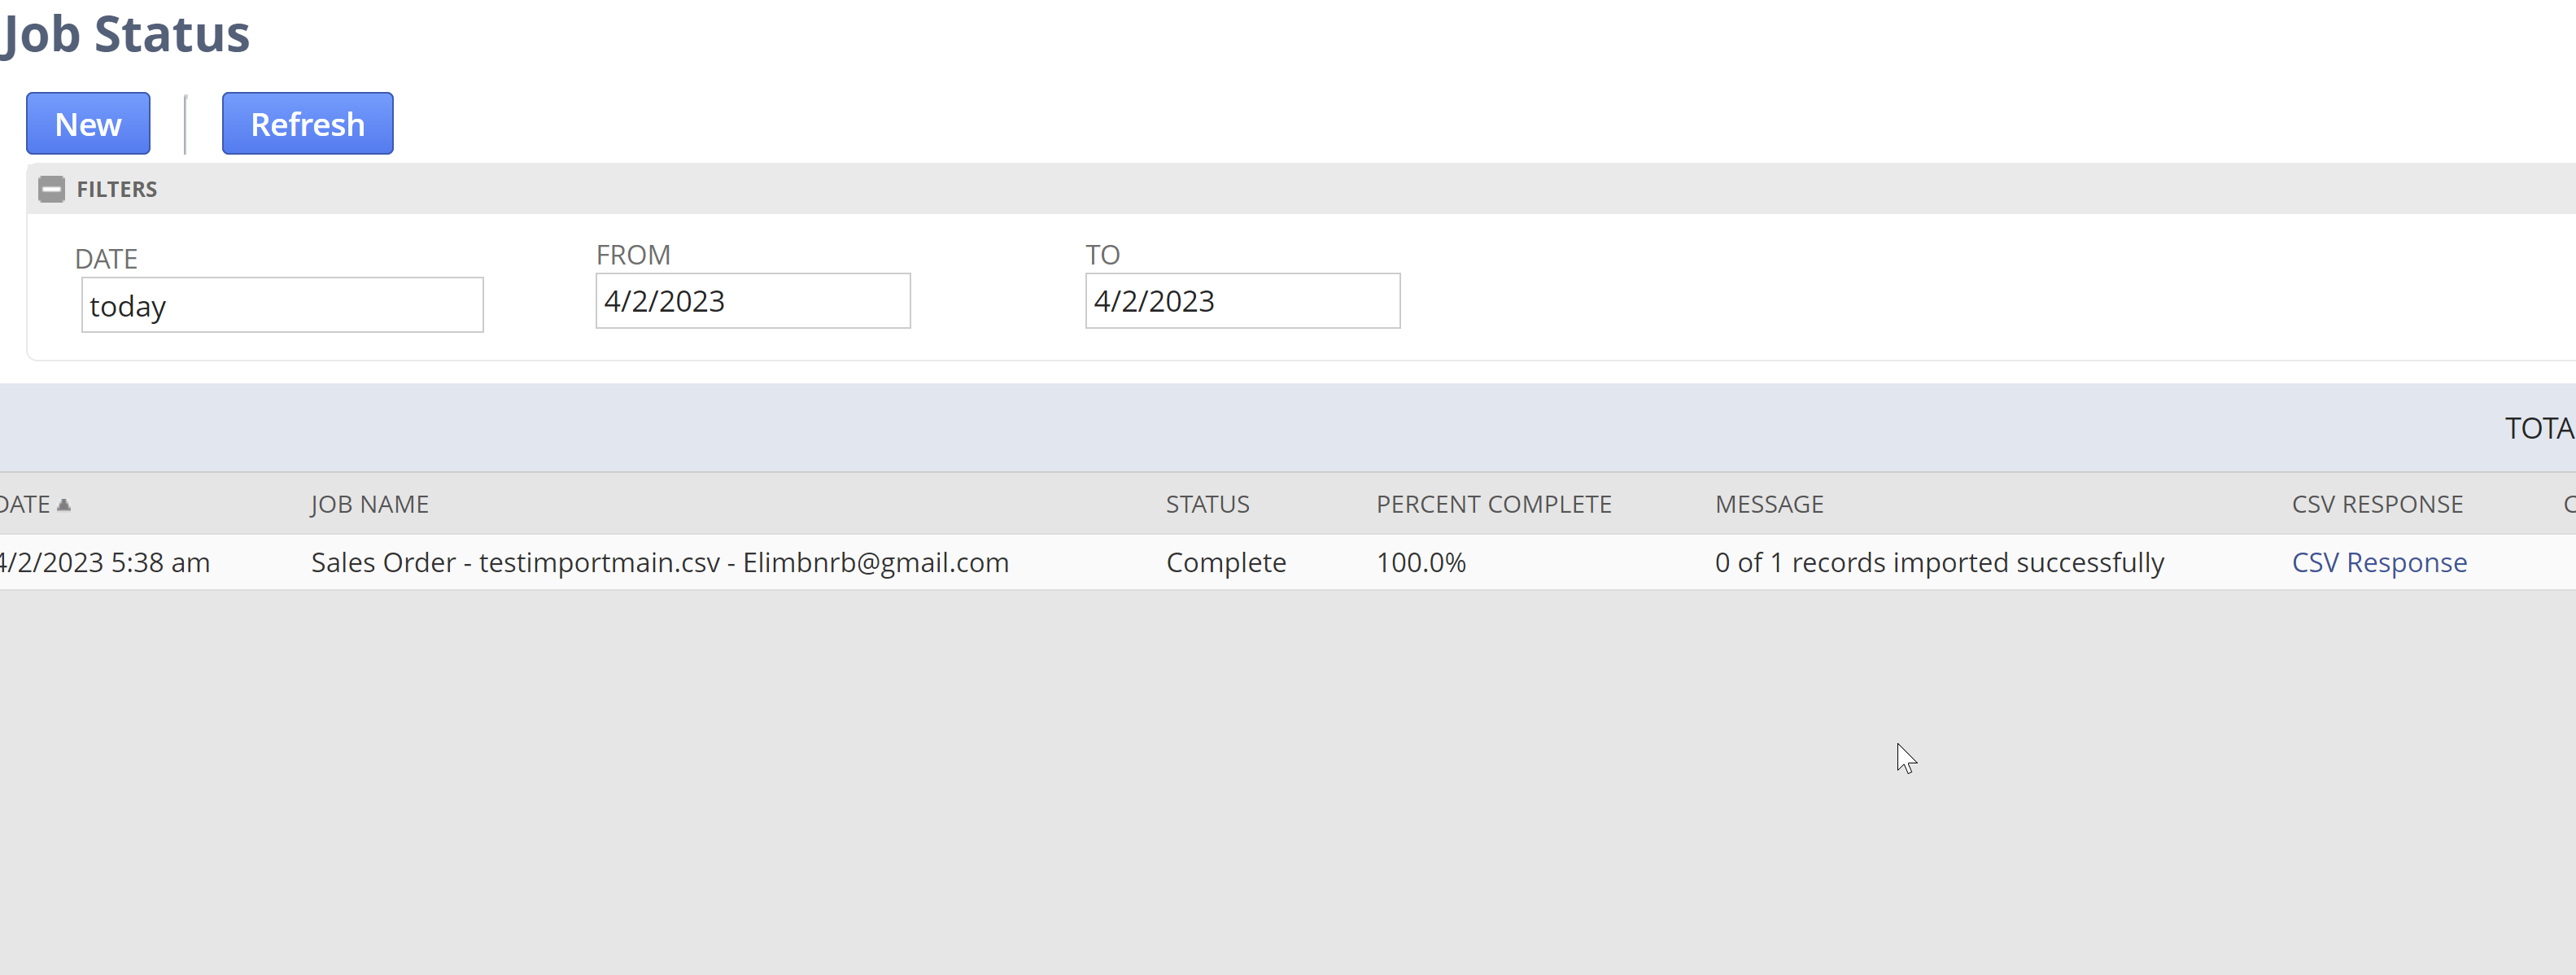
If the import is successful you will see a message like 10/10 records imported successfully.
If the import is not successful you will see a message like n/10 records imported successfully. Sometimes some records will fail other times all records will fail. To figure out why click the download link in the “CSV response” column.